|
First…a little background:
Model years for RVs and campers don’t exactly follow the same rules as cars. You might see some reissues advertised as 2015’s and others as 2016’s, and indeed, production did run over into ’16 to get all 1,941 made. Other than running changes, there is no defacto difference between a ’15 and a ’16.
Total production is comprised of both 16 foot and 19 foot versions, offered in Matador Red, Seafoam Green, and Butternut Yellow. You might be asking yourself, why 1941 when these are modeled off the 1961 version. To commemorate Shasta’s 75th Anniversary, of course.
As you dig into these Shastas, you’ll find they’re essentially hand-built units, and no two are exactly alike. Some problems were sorted out earlier in the run, but others are inherent to the materials or the assembly techniques, some of which were used back in 1961. Unfortunately, not everyone on the payroll in 2016 had the skills to pull off all the techniques. Anyhow…..here we go.
|
General Tips & Tricks
Even if you never dig into the more involved projects in these other pages, the items below are simple little things you should do that will help save time, money and improve your experience.
Vent Screens: You’ll find lots of vents and access doors on the exterior, and insects love ‘em. Use butyl tape and nylon screen material cut to size on the backside of each.
Grab Handle: Is your Shasta missing the chrome exterior entry handle? The early units left the factory without due to limited part availability and Shasta will send you one. See the Exterior Section for details.
Axle Hubs: Grease the heck out of your axle hubs as they’re a little dry from the factory as many owners have discovered. Simply remove the rubber hub plug and get out the grease gun. If your hubs overheat, you risk bearing damage which is bound to show itself at the worst possible time. Any conventional axle grease will do.
A/C Fan: “Hey, the A/C is off, what’s that noise?” If you’re plugged into shore power, even with the air conditioner off, you might hear a fan running near the AC unit. This fan was an attempt to move more air out of the restrictive A/C compartment. On later units, there’s a switch mounted near the left dinette bench to control it, however, earlier units have a thermal switch that kicks this fan on at something silly like 68F ambient, with no way to turn it off. See the Appliance Section for details.
Storage Compartment Locks: Years ago the RV industry standardized on CH751 keys and locks meaning almost anyone can gain access to your Shasta as they’re all the same. A little googling will turn up lots of custom options; just make sure you order the same length tumbler which is 1-1/8" long. Since you can gain access to the trailer interior through the front compartment, you have more at risk than the average camper.
Main Door Latch: More than one owner has had trouble with the "front door" latch sticking or jamming. It's recommended to apply graphite to both keyholes and to refrain from using the deadbolt unless you're inside the trailer. If it jams, your only means of access is through the front storage compartment (if you're skinny enough). You might also want to stash a spare key under the chassis for just such an emergency.
Spare Tire: It’s true, there’s no spare, and no place to mount one. Word is the original lacked a spare as well. You can either carry one in your tow vehicle, let it ride in the Shasta and pull it out at your destination (don’t let it touch the flooring directly or it will discolor the white) or have a mount welded up to mount it off (above) the rear bumper. Be careful, as this will add some weight and the bumper itself isn’t designed for those dynamics. See the Recall/TSB section for more on tires.
Stabilizer Tensioning Rod: Somewhere rolling around in a drawer should be an unmarked 1/2” steel rod. Once you’ve lowered your rear stabilizers, this rod is used to apply extra tension via the holes provided. If yours is MIA (like ours was), pick up a 1/2" ‘garage door torsion winding bar’, it appears to be almost identical and works great.
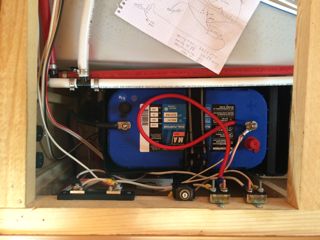
Battery: Yep, most of these Airflytes shipped without batteries but some dealers included them as part of the sale. If you need one, shop for the largest Deep Cycle lead-acid battery that will fit the battery box. Should you want to relocate the (poorly located) box and upgrade capacity at the same time, see the Electrical Section. You might consider a sealed battery (Optima) in that case. You might also wonder what the (open) hole in the battery box under the battery is for. Since a lead-acid battery outgasses during charging, a tube leading out of the top of the battery box leads to a vent on the rear of the Shasta, and the hole in the bottom of the box allows fresh air to enter.
Brake Lanyard: If you're new to travel trailers, you might be curious about the long, skinny wire hanging off the front tongue. When pulled, the end will disconnect from a break-away switch which activates your trailer brakes, which is a good thing if the trailer comes loose from the tow vehicle. But you might have noticed that wire is unwieldy and can get caught up in the pivot, or worse. Available from Amazon and other sources, you can find a coiled version that will keep it out of harm's way. This is the one we use.
|
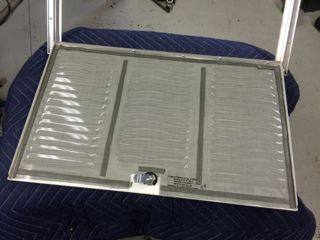
Butyl tape holds fiberglass screen material in place and keeps bugs out.
|
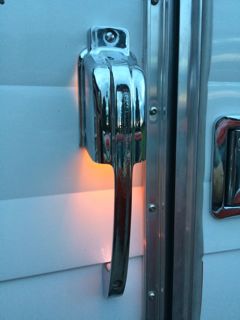
Factory handle installed with stainless hardware.
|
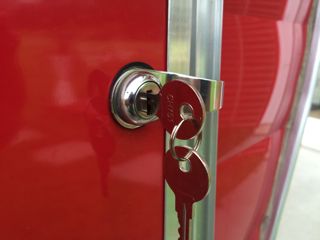
Example of factory-style lock tumbler. Replace with a custom keyed unit.
|
|
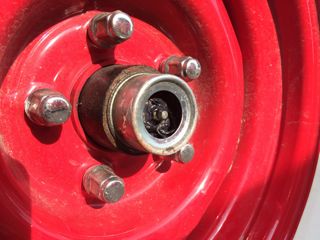
Rubber plug removed to show grease zerk in axle hub.
|

Garage door spring winding bars fit the rear stabilizers.
|
An example of battery relocation to the front bench.
|
Return to Home
Cory Heisterkamp 2017