Plumbing & Electrical
Let's start with some Plumbing Tips....
If you haven’t figured it out yet, the tank capacities listed in the specifications are off. Way off. Measured max capacities are Blackwater: 6 gal (not 11). Graywater: 12gal (not 18). And a claimed Freshwater capacity of 25 gal, which I believe is correct. Following the lead of at least a couple other owners, I fitted an additional tank under the rear chassis where the old blackwater pipe ran. With a valve on each side, I can use this for extra blackwater OR graywater storage depending on the need.
In addition, the level sensors are way off on the freshwater tank. To correct this, measure and mark the tank at 1/3 height and 2/3 height with a Sharpie and drill a 3/8 hole at these spots (a right angle drill will help). Insert and tighten new sensor ‘well nuts’ (google MP5 sensor) and move the respective 1/3 and 2/3 sensor wires over. You’ll need to remove the side panel of the bench for wiring access, just use a putty knife and carefully pry the panel out (it’s attached with staples) after doing the same with the corner trim. You can leave the old sensors in place.
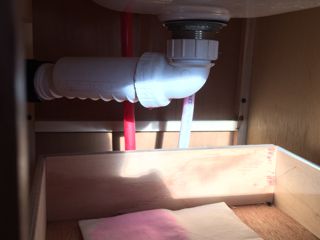
Plumbing throughout the Shasta is PEX tubing. On our 16’, there’s a low point drain for hot and cold behind the driver’s side tire (directly below the sink) and another drain location under the front bench. These lines operate at city pressure when connected to a water source, or at lower pressure via the pump and freshwater tank in the bench. When moving the pump to allow space for the battery, I decided to make a few changes to the layout of the valves and vinyl tubing to aid in winterizing. Should you do something similar, make sure any tubing you pick up is safe for potable water.
Drain traps for the sink and shower are a ‘waterless’ type that do not require RV antifreeze when winterizing. Our sink trap was stripped out from the factory and leaked from day one. See the Kitchen & Bath section for details.
The blackwater pipe from the holding tank that runs across the rear of the trailer was ill-secured. The pipe-hanger clamp was too large for the pipe, and it was attached to the frame horizontally. It did nothing to support the pipe weight. The clamp does, however, fit snugly on the adjacent valve inlet, and with a driver extension, you can snake a screw in to mount it vertically.
As is the case with any RV/camper holding tank setup, a second valve at the street connection is good insurance when it comes time to dump the tanks. We added a twist-on type, available online and at most larger hardware stores (no tools necessary), though if you’re comfortable gluing ABS, there are plenty of options. Also check the valve handles to ensure the backing nut is tight and facing the correct way (ours wasn't) or you could lose your handles.
Freshwater drain valve: If you’d rather dump your freshwater after camping and before hitting the road, consider installing a 1/4 turn PEX drain valve in place of the factory threaded plug. A flick of the wrist under the chassis and you’re on your way.
Example of one of the waterless traps on the kitchen sink (stripped out from new). This was replaced when the larger sink was installed. See Bath & Kitchen section for details.
|
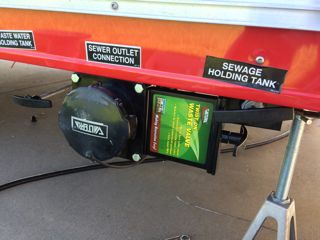
Secondary waste valve screwed onto sewer connection. To get this horizontal fit, I pulled the 4 valve screws, twisted the back piece into place and reassembled.
|
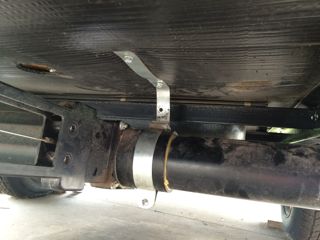
Strap moved on blackwater pipe at rear so it's actually supported.
|
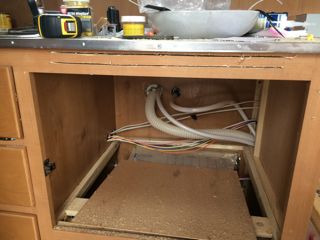
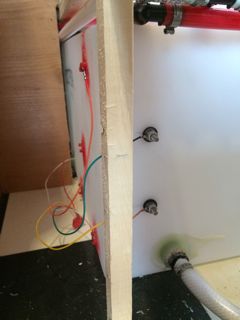
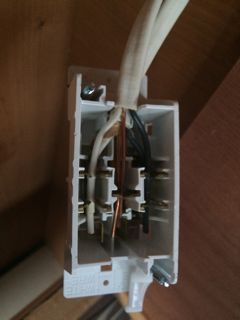
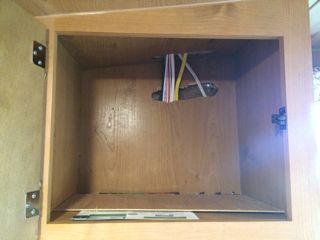
Access panel removed to show wiring and plumbing.
|
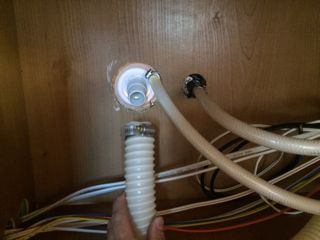
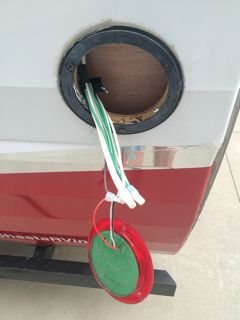
Yep, this popped off. Make sure both city water and freshwater hoses are fully engaged and clamps are secure.
|
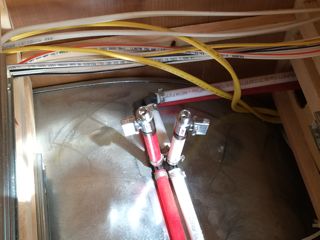
Shutoff valves added to hot and cold sink supply. Sink was out anyway, so why not? Same type valve was crimped on freshwater tank drain line under trailer. Just reach under and twist.
|
|
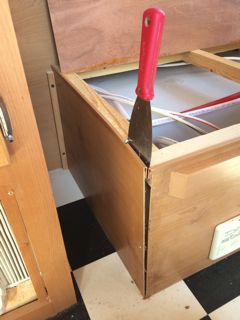
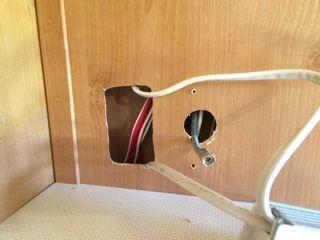
After removing corner trim, carefully pry panel off. Brads will pull through and can be removed after panel is clear.
|
New sensors on face of tank at 1/3 and 2/3 levels.
Old sensors remain to keep tank sealed.
|
The Electrical System
In general, the electrical system was designed for rapid assembly, though that still doesn’t excuse some of what I found. I highly recommend reviewing the EL system PDF which contains schematics and other pointers.
----------------> Follow this link for circuit info, fuse callouts, etc. that you'll want to print and keep with your Shasta. <-----------------
AC System: The shore connection is a 30A twist-lock connector that feeds 10 ga romex that runs to the converter. From there power is distributed to conventional breakers that feed the fridge, the water heater, the microwave and A/C and the receptacles. You can connect to a 50A service when camping, but your trailer will only use a fraction of that.
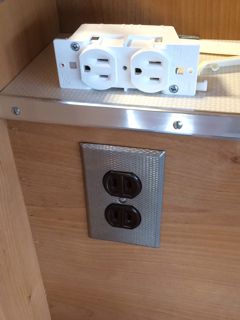
There are 5 receptacles on a 16’ Shasta and they’re all the ‘stab to connect’ type used in the RV industry. I have no reason to doubt they’re not adequate, but I could picture vibration taking its toll years from now and changed them all out to conventional residential screw types. This meant enlarging some of the holes and using ‘low voltage’ trim rings which have ears like the RV receptacles. Note these 5 receptacles are on the one GFCI circuit breaker. No real issue there.
Rear of receptacle showing 'stab' type connections with Romex.
|
There's good access to DC wiring (should the need arise) by pulling recept at TV shelf. Both the Coax and Recept got changed to dark brown along with matching plates which better blend in.
|
Out with the new, in with the old. NOS 1960's bakelite recept
mounted with a trim ring and vintage plate.
|
DC System: The good news is the majority of electrical devices are low current and so voltage drop isn’t really an issue, however there are some easy upgrades you should consider.
1. Relocate the battery box to the front dinette bench. Here’s what I didn’t like: the battery is all the way in the rear, taking up valuable storage space and preventing storage of any long items. It also meant the charging circuit from the tow vehicle had to run all the way to the back of the trailer, unfused and under the chassis. And it meant the 12v power to/from the converter that runs everything in the trailer had to drop below the chassis and run to the rear as well. Lots of voltage drop and lots of potential for damage.
By moving the water pump 180 degrees in the front dinette (a good opportunity to clean up some plumbing), there was just enough room to put in an Optima bluetop group 31 battery and box (AGM – no venting required). The wiring to the converter was simply pulled back up through the floor hole and routed over to the bench following the path of the existing wire bundle through the kitchen cabinets. The charge circuit from the tow vehicle is already accessible in the j-box in that bench, so it was a simple matter of picking off that circuit there. Now I had plenty of 12ga wire left over to perform the refrigerator DC upgrade (see Appliance section). I installed two 30A self-resetting breakers- one for the converter pair and one for the tow vehicle charge pair.
2. Excess wire on rear circuit. You might have noticed two wire pairs routed to the CO detector in the dinette bench. One is the power for that circuit from the converter, the other routes back to the converter area to head up the wall and cross over the ceiling to drop down and power the rear control panel (water pump) and other lights. That’s quite a side trip to power a <1 Amp device only to return to where you came from. The solution is to slide the microwave out, ID the wire pair that heads up into the wall from the CO monitor, and cut it off, leaving enough slack to wire directly to the pair leaving the converter. You can then pull the excess wire out at the bench. Now the circuit leaves the converter and one branch heads up the wall, the other branch heads to the CO monitor and you’ve got more wire leftover.
3. Wire crimps. The good news is I’ve found no hidden crimps; they’re all at the switch or load that connects to that circuit which makes troubleshooting a lot easier. Any time you come across a factory electrical crimp, give it a tug. Some are good. Some aren’t so good. The j-box in the front left dinette where the 7-pin trailer connector interfaces with the trailer wiring is an especially sore point. Carefully check those crimps and make sure more than a couple wire strands are making contact. This is also where your trailer brakes interface, so it pays to take a few minutes to check it out.
EL Accessories: Every amp counts, so the first order of business was taking out the wiring inefficiencies mentioned above. Next was surveying the current draw on the loads. The range hood bulb is incandescent, but all others (excluding the "Edison" over the table) are LED and draw little power. Devices that present constant current draw (like the CO Monitor) get a switch to shut them off if not needed. This goes for 12v power outlets and USB charging jacks we’ve added.
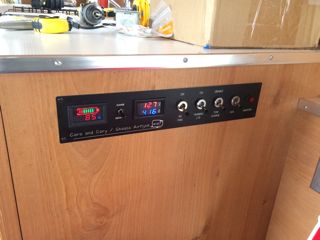
Custom control panel monitors battery voltage and current. Allows control of the aux AC fan, disconnection of power from the vehicle to prevent reverse discharge, and trailer brake disconnect so lanyard can be pulled without killing battery should some joker want to mess with your Shasta.
|
Another convenient wiring access point is in the cabinet over the stove. Both AC and DC lines run straight down this wall to the converter.
|
Battery in rear gaucho bench. One pair is the 12V feed from the vehicle, at the complete opposite end of the trailer (plus veh. harness length). Other feed goes all the way back and across to the Converter. Silly. Removed all this wiring and relocated the batt to the front bench.
|

The AGM battery just fits in the front bench. Plumbing is cleaned up and pump rotated 180°. DC losses much improved.
|
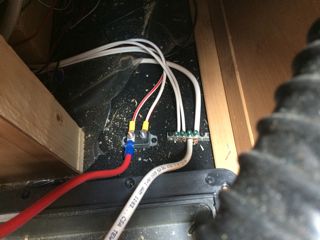
Strictly speaking, all exterior brake/turn/running lights have isolated wiring that runs directly from the j-box in the front bench to the right rear taillight (at least on our 16'). If lights aren't working and the j-box checks out, this is the next place I'd check for voltage.
|

Inside the j-box where the trailer's vehicle connector meets the trailer wiring. Crimp above literally came off in my hand. Note bulk of strands don't even touch! This is a good place to start if troubleshooting exterior light problems.
|
Going Solar: The plan is to add 'off grid' solar capability to our Shasta in 2018 so we can boondock as well as take advantage of those attractive campsites that lack shore power. More to come!
Update: The new solar setup is up and running....click here for the details!

Return to Home
Cory Heisterkamp 2018