Exterior Improvements, Upgrades and Leakpoints
Rock Guards: You need one, plain and simple. Hehr is now only making production runs of our glass once a year (production has ceased) and too many folks have already had to replace front glass from thrown gravel. Solutions vary from vinyl covers with snaps to aluminum-framed plywood and lexan and even plastic sheeting permanently screwed down. Custom-made awning/rock guards are available from several owner/creators. Try Google or the Shasta FB groups.
Hub Caps: Why are these steelies bare? Dress them up with baby moons from Vintage Trailer Supply. Check out VTS-595.
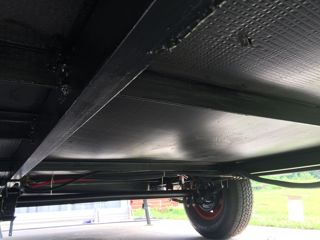
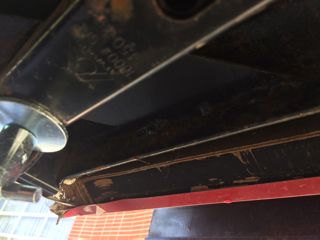
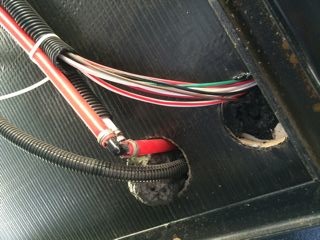
Frame: Grab a paintbrush and some Rustoleum Semi-Gloss and get acquainted with your frame. Not exactly a fun job, but you’ll see what areas are missing paint, what nuts/bolts could use tightening, and what holes need spray foam to keep rodents out. You might also encounter all manner of dangling wires that should be zip tied up out of harm’s way. A coat of paint and some white lithium grease should help those rear stabilizers when you really need them, rather than laying on your back in the dirt down the road. Pay special attention to any exposed wood blocking along the front and rear walls.
|
|
|
| The chrome is a little thin on the VTS caps. Clearcoat will help prevent any rust from popping up. | It didn't take much road salt to cause this damage. | Rear of trailer- fresh paint on steel and bottom of wall wood framing. Hole shown is "vent" for the battery box. Filled in later with black spray foam as battery was relocated. |
|
|
|
| Fresh paint front to back, especially at welded joints. | Rear wood framing prior to paint. Note stabilizer rusting. These were cleaned, painted and white lithium grease applied to the pivot/slide points. | Lots of exposed wiring and oversize holes for mice and other critters. Additional conduit was added for protection and holes sealed up with spray foam. |
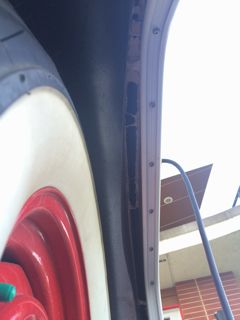
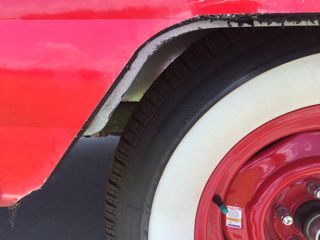
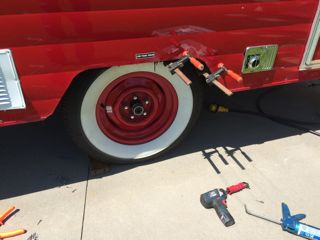
Wheel wells: Our (#147) wheel wells were bowed along the outside edges allowing all manner of road debris to get tossed up between the well and the exposed-wood trailer walls (not the best thing in the rain). One side had a rubber sealant added which did nothing to adhere the metal and only made things worse as the metal now couldn’t lay flat. To fix it properly, I removed the wheel arch trim and used clamps to get the well metal flat with the outer wall (had to notch one side to take the stress out of it). Then I used a series of screws to attach the sheetmetal around the inside perimeter and folded the excess over the edge of the opening. I also added a few missing wheel arch screws as the factory didn’t want to go to the effort of pre-drilling into the metal frame where the trim “ears” extend over.
 |
 |
 |
| Here's the problem. Step one is removing the arch moulding. | New problem...wheel well extends into opening when flattened out. This was solved by slitting the exposed sheetmetal every 1" and folding outward. | Clamps hold the sheetmetal against the inner wall allowing screws to be driven in around inside perimeter (not the edge). Any glue or foreign material should be cleaned out before clamping to ensure metal lays flat. |
 |
 |
 |
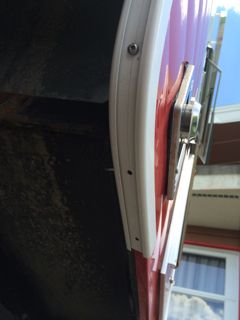
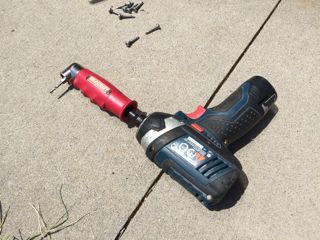
| The arch moulding is screwed into the edge of the plywood outer wall from the factory. For less distortion and greater retention, add stainless screws through the holes lacking screws. The backing is steel so you'll need to drill pilot holes. Even 1 or 2 is worthwhile. No more 'droop'. | This right-angle attachment allows drilling pilot holes (see small bit in head) around the perimeter of the inside wheel well. A philips bit goes in next and screws can be torqued down without having to remove the tire for clearance. | Unrelated to the wheelwell, but another exterior leakpoint. This is the LED behind the grabhandle. With the misaligned hole, it wouldn't sit flat. If the handle had been installed from the factory I never would have found it. |
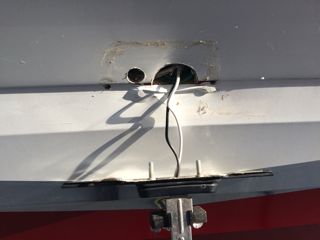
Dual LP Tank Mount: The original tank holder had the bottle too close to the front wall for comfort, and since we plan to boondock, we’d need at least two tanks. I picked up the Flame King KT20MNT cylinder rack and a dual changeover regulator off Amazon along with a second pigtail hose. There’s enough clearance to space the rack out from the body and still secure it at 4 points on the front tongue. If you run an equalizer bar setup, make sure your chosen location doesn't interfere. To mount the regulator, I used some aluminum bar stock to make a U-shaped bracket/mount which slips over the tank hold-down rod.
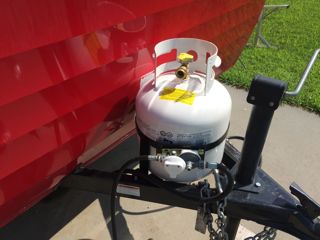
Original tank practically touching the wall. Even if you have clearance when pakred, remember that wall will flex with travel. |

Rust-o-rama. These surfaces got cleaned up and fresh paint applied. |
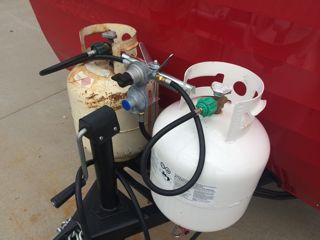
Dual setup splits the difference of wall clearance and regulator clearance to the jack. Original hose reaches new regulator. |
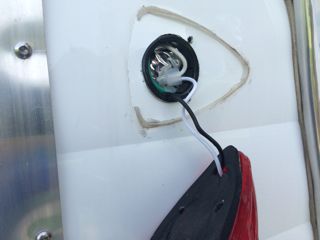
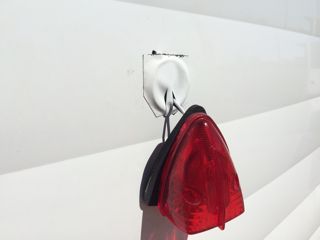
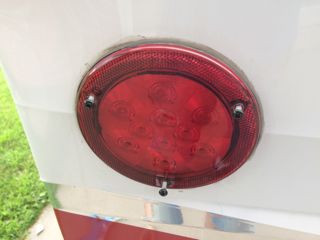
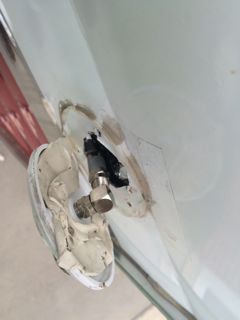
Exterior Lighting & Attachments (Leaks): The exterior lights are good quality and an LED type, but I ended up unscrewing them all, correcting little issues, and resealing them properly. There’s no reason to have a 1” hole for a pair of 16 ga wires, and attachment screws weren’t always biting into metal. In most cases, I used residential window and door tape to seal over the large holes, dressing the wiring down so water would run off, notching out a center portion of the light’s gasket so the wiring wasn’t putting pressure on the gasket, then putting a bead of silicone on each gasket face and reattaching. When the light is off, clean off the sloppy silicone the factory put on the siding.
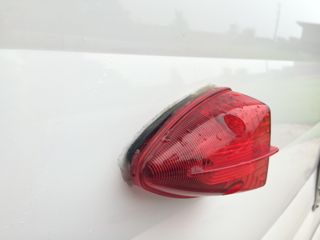
This advice goes for any other exterior attachment, like the Cable TV coax connector which might as well not have had any sealant at all for how it was applied. Pull it, check it, seal it. This is also a good time to replace the screws on the rear taillights. #10 1” stainless have more bite (mine were already stripped out) and no paint to chip off the heads. With regards to the license plate bracket and light, the mounting location changed somewhere along production, but ours is right on the horizontal siding seam and was difficult to get sealed correctly. I found oversized holes beneath and did my best to seal these with window tape and silicone before reassembling. Keep in mind, the license plate screws come in from behind with the nuts on the outside, so slip those screws in now before reattaching.
Note: You don't need to cut the taillight gasket to remove/install it like the factory did to one side. It's rubber, it stretches.
|
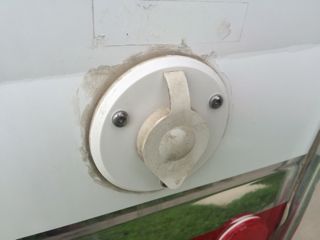
Sidemarker as-installed by the factory. |
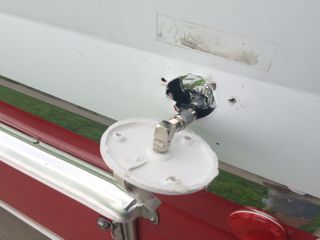
Giant hole. 1 of 2 screws missed metal. No silicone at all on the gasket face. |
Window tape now covers hole, gasket notched out so wiring doesn't distort it. Silicone then installed around hole- not visible once light gets installed. |
|
Paint flaking off cheap screw heads; stripped out from factory. Look at all that ugly silicone. Replaced with SS. |
Direct from the factory. Oh my. |
Old residue removed, note fresh silicone bead on plate perimeter. |
|
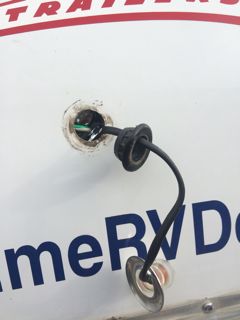
This is what was hiding under the coax plate, a bunch of smooshed butyl tape. No way would this keep out water. |

Rubber gasket removed, residue cleaned up. |
Silicone on gaskets will make a tight seal when in compression. |
Wings: What can I say, the screws are too short and they’re not even stainless. They might look fine today but I want them to look (and hold) just as well years from now. The majority of fasteners used elsewhere are SS, no reason not to use them here. The size you’ll need is #10 x 3”, 5 per side. Since one of our wings had ‘bottomed out’ against the drip rail, I took the opportunity to swap in some longer spacers on each side, made up from clear 1/2” PEX tubing.
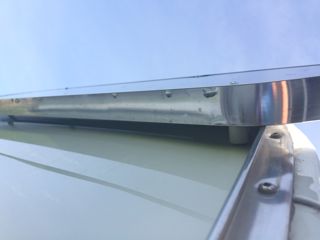
Wing up against the rear drip rail. I cut new, slightly longer spacers out of 1/2" Pex. |
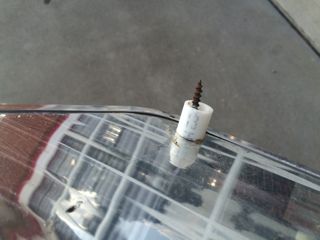
Rust already! Replaced all wing screws with longer SS hardware. I really didn't want to lose a wing in the future. |
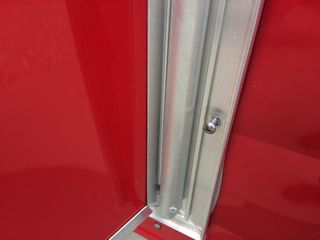
Check all those exterior screws for tightness. Here's one (of several) the factory forgot to run in. |
Big-Time Leaks: They’re unavoidable in any travel trailer, but should you find water ingress around your back wall and gaucho, here are some tips:
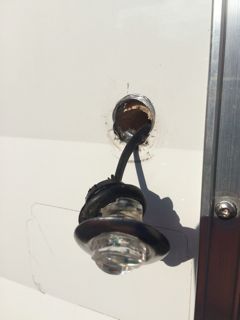
Remove the three exterior LED lights above the rear window by gently rocking back and forth while pulling straight out. Clean all surfaces and apply a liberal amount of silicone to the siding and backside of the trim. When pushed back into place, the silicone should squeeze out. Clean off excess.
|
Could this hole be any bigger? I cleaned up all residue and sealed the opening with window tape with a drip loop for the wiring. |
Major leak-point. Wiggle these LED's out carefully, then pull out the rubber o-rings. |
Clean the sheetmetal, seal around the rubber o-ring before reinserting and then more silicone under the chrome trim ring before pressing the LED into place. |
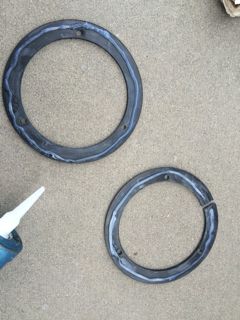
Rear Window R&R (16' Only): If you look closely, you can see the factory used an open-cell foam seal between the rear window frame and the siding. This should really be closed foam or butyl tape to keep water out. If you’re still having issues, it’s recommended to pull out this window and replace this with a butyl seal. The other thing to look for is the presence of sealant in the lower rear corners between the black seal and the aluminum trim when you open the window. Fill these corners with silicone if necessary, otherwise water will accumulate.
Tank Vent: The blackwater tank vent exits the roof directly on a seam (this may have been moved on later production numbers). Check for adequate sealant around this pipe. Dicor self-leveling lap sealant can be used if necessary. Also see the Bath/Kitchen section for more on this issue which stems from lack of blackwater tank support.
Roof Seams: Despite the advertising of a ‘one piece roof’, it is in fact made of 4 different pieces with an S-lock joint. That’s fairly typical and isn’t usually a source of water intrusion but it’s something to keep in mind if you have the Dicor out.
Cory Heisterkamp 2017